


DIY: How to Drain, Change and Bleed your Radiator
Why you should upgrade to an aftermarket performance radiator
A radiator is a vital component of any liquid cooled engine. With a cracked or leaking radiator, you constantly run the risk of overheating your ride. At the same time, even if your radiator is fine, if it's not bled properly it will have air pockets that can result in fluctuating engine temps and possible overheating. If you plan on racing or doing any sort of extended spirited driving, an upgraded aluminum radiator is one of the first things that should be taken into consideration.
This is a brief description of how to remove, install, and bleed an aluminum radiator on a liquid cooled engine. There are a variety of techniques that can be done to have the same end result, this is what we’ve found most efficient and effective.
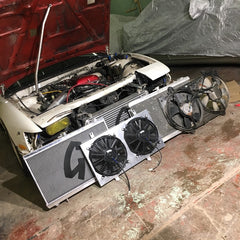
The ride that will be going under the knife today is our trusty Nissan 180sx S13 with an sr20det.This vehicle has been with us for almost a decade now. And is still going. Maintenance is a vital component to keeping your ride reliable. Street or track.
Tools & Materials Needed
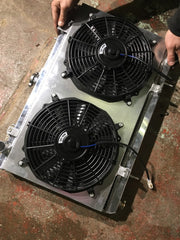
- New Grassroots Performance Aluminum Radiator (silicone hoses and electric radiator fans are also available)
- Drain Pan (A large aluminum cooking tray will do the trick).
- Coolant of your choice (50/50 premix, diluted concentrate, distilled water, water wetter, Lucas super coolant, etc)
- Socket set/wrench set
- Radiator Bleed Kit (optional)
Step 1: How to drain a radiator
**MAKE SURE ENGINE IS COOLED DOWN FOR THIS PROCESS
- Start by carefully removing the radiator cap. This will release any pressure that’s already built up in the cooling system, and allow a free flowing draining process.
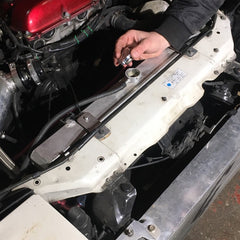
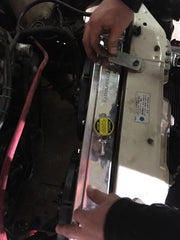
- Locate the radiator drain plug for your radiator, and place your drain pan under it.
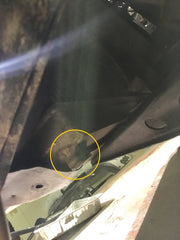
- Now you can safely remove the radiator drain plug and collect all the old radiator fluid into your drain pan. Give the radiator hoses a little squeeze to get as much fluid out as possible.
****A quick and dirty way to drain your radiator would be to just remove the lower radiator hose completely, and the coolant will come rushing out. This will make a mess of your workspace. We do not recommend this.
Step 2: Remove the Radiator
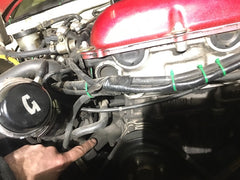
- Now that your old radiator is drained, you can safely remove the upper and lower radiator hoses.
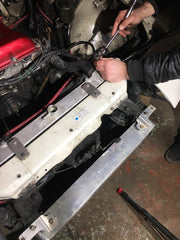
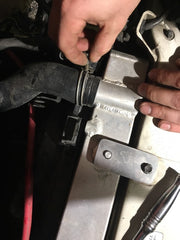
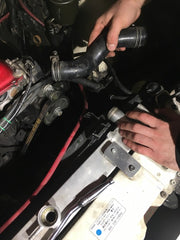
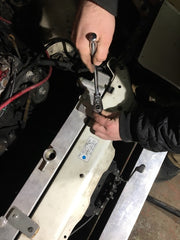
- Now remove any radiator mounting brackets that are holding your radiator in place. Disconnect any plugs or harness that may be connected to the radiator.
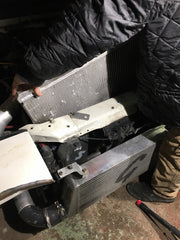
- Carefully remove the radiator from out of the car.
At this time it is recommended to replace your thermostat. Especially if your car was overheating before beginning this install there is a likely chance that your existing thermostat could have been damaged.
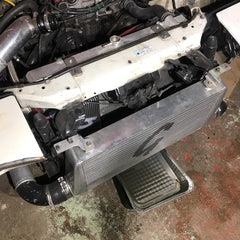
Step 3: Prep/Install New Radiator
All Grassroots Performance Radiators are tested, quality inspected, and come with a lifetime warranty. Includes a Radiator Cap.
- If you are using your existing fans, this would be a good time to switch everything over. If you are installing a new radiator fan and shroud, this is also a good time to install them.
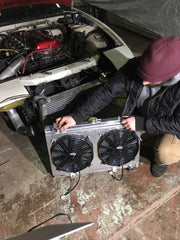
- Carefully install your new performance radiator into place. Re-install the existing radiator mounting brackets. Install the upper and lower radiator hoses. Plug in your electric fan harness (if applicable).
Step 4: How to bleed a radiator
This is a question that’s been answered many times. There is a variety of right and wrong ways to do this. But it’s really quite simple. Here at Grassroots Performance, we have never had an issue using the standard “Radiator Bleed Kit”. Available at Canadian Tire, or any other auto parts store. If you’re really on a budget, or just don’t want to make the trip to get it. You can follow the same procedure by just being careful and watching the radiator neck.
Bleed Process
- Have your ride on a flat surface.
- Ensure coolant lines, radiator mounts, and radiator drain plug are securely fastened.
- Fill the radiator with your desired coolant.
- Insert the “Bleed Kit” on the neck of the radiator and continue filling until it's half full.
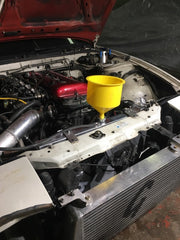
- If you are not using a radiator bleed kit, fill your radiator to the top of the neck.
- Ensure there is coolant in your overflow tank.
- Start your engine. Do not put the radiator cap on (ensure you are in a well-ventilated area).
- As your engine gets up to operating temperature, your thermostat will slowly open. You will notice bubbles and gurgles of air coming up through the coolant. This is a good sign. Make sure you are always adding coolant while the engine is sucking it down. Keep the coolant level above the top of the radiator. Continue this process for about 10-15 min. Keep adding water until the engine is at operating temperature, and the bubbles have stopped.
- Now that the air bubbles have stopped, and your radiator and overflow tank are both full, you can now put the Radiator cap back on.
Congratulations, you just installed a performance radiator. Now get to the track and enjoy some extended track time with your cooler running engine.
------------
Grassroots Performance has a variety of radiators and cooling components with a lifetime warranty. Including silicone hoses, fan shrouds, electric fans, oil cooler kits, and other race car essentials. For many makes and models.
1 Response
Leave a comment
Comments will be approved before showing up.
![Track Test of our Grassroots Performance 19-Row Oil Cooler [PROVEN]](http://grassrootsparts.com/cdn/shop/articles/Track_Test_of_our_19-Row_Oil_Cooler_1600x.jpg?v=1696426120)
![Track Test of our Grassroots Performance 19-Row Oil Cooler [PROVEN]](http://grassrootsparts.com/cdn/shop/articles/Track_Test_of_our_19-Row_Oil_Cooler_2000x.jpg?v=1696426120)


amar
May 22, 2018
What if the bubbles and gurgles of air did’nt stop after 10 minutes even if we service the radiator and replace with the new coolant fluid.