


![Track Test of our Grassroots Performance 19-Row Oil Cooler [PROVEN] Grassroots Performance](http://grassrootsparts.com/cdn/shop/articles/Track_Test_of_our_19-Row_Oil_Cooler_416eeadd-9c06-426c-93e3-9b06bedd3c36_1600x.jpg?v=1775057868)
![Track Test of our Grassroots Performance 19-Row Oil Cooler [PROVEN] Grassroots Performance](http://grassrootsparts.com/cdn/shop/articles/Track_Test_of_our_19-Row_Oil_Cooler_416eeadd-9c06-426c-93e3-9b06bedd3c36_2000x.jpg?v=1775057868)
Track Test of our Grassroots Performance 19-Row Oil Cooler [PROVEN]
In 2021, we asked BSquared to test and evaluate the performance of our Grassroots Performance 19-Row Oil Cooler. Here's what happened.
REPORT SUMMARY
Our 19-Row Oil Cooler was installed on a Toyota 86/Subaru BRZ platform. A comparison case was developed by comparing the oil temperature variations on two NA 86’s. Car A is the 86 with the Grassroots Oil Cooler installed while Car B is the baseline vehicle, a stock 86. Both vehicles completed a Time-Attack style stint of one warm-up lap, three hot laps, and one cooldown lap under the same driving pattern.

OIL COOLER TEST SETUP
Track conditions: The tests were carried out at Shannonville Motorsport Park (ON, Canada) which has a long layout. The track is ideal for the purpose of the validation as it offers a mixture of tight technical corners and long straights where both successive RPM variations and sustained high RPM can be achieved. The decision on the location is to make the test broad spectrum so that the results presented in this document is generally representative for other types of tracks as well. On the test day, it was mostly sunny with some overcast. The air and ground temperatures were approximately 10 °C and 12 °C, respectively.
Test vehicles: Two NA 86’s were used as test objects. The Grassroots Oil Cooler was installed in Car A. Car B is the baseline vehicle, a stock 86. Both vehicles received identical Castrol 5W-40 synthetic oils, identical OEM oil filters, and were pumped at the same fuel stations prior to the test day. Each car was tested in direct succession after the other and were driven by the same driver, maintaining the same track conditions, and mitigating human factor.

STRATEGY & CONSIDERATIONS
Driving patterns. Driver completed a Time-Attack style stint of one warm-up lap, three hot laps, and one cooldown lap on both cars. This is to replicate the driving patterns of both time-attack and casual lapping that most potential customers would achieve in their 86’s.
Modifications. The modifications (i.e., header, engine tune, springs, tires) do not play a significant role in affecting the cooling capability of the heat exchanger.
Driver’s efforts. Repeated laps were executed by the same driver on warm-up, hot, and cool-down laps, following a similar path and RPM ramp-up pattern. Time and driving behavior variations were mitigated, and negligible influence was observed on oil temperature ramping and cool-down. The Time-Attack style was maintained by the driver driving to the fullest potential, obtaining the fastest lap time for both vehicles.
ANALYSIS RESULTS
"the Grassroots 19-Row Oil Cooler experienced a significant cooling effect on engine oil of nearly 68 °F in peak conditions"
1. Cooling performance in peak heat conditions
Figure 1 demonstrates the difference in engine oil temperature and engine RPM between Car A and Car B in a single hot lap. In Car A, a mean temperature of 95 °C was observed and was considerably lower than that in Car B by 20 °C, in peak heat conditions. The plot of engine RPM vs. Time shows a consistent driving behavior of the same driver. Thus, the oil cooler is shown to be capable of sustained temperature cooling in peak engine heat soak.

Figure 1. Single hot lap: comparison of Car A and Car B: (1) Temperature (C° ) vs. Time(min); (2) Engine RPM vs. Time(min)
2. Consistent cooling at high RPM
Figure 2 shows the temperature spread over the RPM range (0 – 7500 rpm). A clear gap in temperature between Car A (with the Grassroots 19-Row Oil Cooler) and Car B (without oil cooling) was observed, indicating a consistent cooling at any RPM. At any RPM in peak heat soak, the Grassroots 19-Row Oil Cooler consistently kept the temperature down below 100 °C while the oil temperature in Car B reached 120 °C the highest. With hotter ambient temperatures in summer months, the 86 platform commonly sees 135 °C or higher oil temperatures. It should be noted that many oils are rated to a maximum temperature of 145 °C sustained before the lubricative properties fail. Given that, the Grassroots Performance 19-Row Oil Cooler successfully maintained a sub-100 °C temperature in peak heat soak. This is direct evidence that the Grassroots Performance oil cooler at work keeps the engine oil properly lubricating the system without any risk of chemical breakdown.

Figure 2. Engine RPM vs. Temperature in Car A and Car B
3.Cooling performance on warm-up lap
Figure 3 shows the difference in temperature and engine RPM between Car A and Car B on a warm-up lap where temperature ramp-up was considered. On the same lap, Car A and Car B had a ramp-up rate of approximately 5.25 °C/min and 12.37 °C/min, respectively. The oil cooler could potentially slow down the heat-up in oil temperature during warm-up laps, as the results showed that it took significantly longer to heat up in Car A. Thus, it is recommended that care should be taken by the driver to allow the cars to heat up to operating temperature before driving at full pace.

Figure 3. Full lap: comparison of Car A and Car B: (1) Temperature (C° ) vs. Time(min); (2) Engine RPM vs. Time(min)
4. Cooling performance on cool-down lap
Figure 4 shows the difference in temperature and engine RPM between Car A and Car B on a cool-down lap. Car A was observed to have a cooling rate of 4 °C/min, and Car B had a cooling rate of 3.66 °C/min. Both vehicles presented a similar cooling rate. This is possibly the result of the driver still applying throttle throughout the cool-down lap, thus re-heating the oil (see the plot of engine RPM vs. time shown at the bottom).

Figure 4. Cool down lap: comparison of Car A and Car B: (1) Temperature (C° ) vs. Time(min); (2) Engine RPM vs. Time(min)
CONCLUSION
The Grassroots 19-Row Oil Cooler for Toyota 86/Subaru BRZ was shown to have effective performance in keeping engine oil temperature below the upper limits of performance oil temperature threshold. Compared to baseline 86’s, vehicles equipped with Grassroots 19-Row Oil Cooler experienced a significant cooling effect on engine oil of nearly 20 °C in peak conditions. This is critical to any safety and performance factors in racing applications. The oil cooler exhibits considerable cooling control at temperature ramp-up, but did not provide a significantly faster cool-down rate. This indicates that the drivers should drive at faster pace on their warm-up laps in order to get the engine oil to operating temperatures as the cooler could slow down the onset of temperature increase.
FULL REPORT PDF "Track Evaluation of the Grassroots Performance 19-Row Oil Cooler on Toyota 86/Subaru BRZ, by BSquared"
Purchase our Grassroots Performance FRS/BRZ/GT86 Oil Cooler Kit


A Guide To Oil Cooler Line Orientation Installation
One of the most important aspects to understand is how the oil will flow from the engine, through the cooler and or filter relocation, and back to the engine. Inside the guide are some pictures identifying the inlets and outlets of various adapters we offer.
Due to how critical cooling is in a competitive environment we urge you to read fully through the following guidelines prior to installation. If you don’t fully understand the instructions please have a competent shop perform the installation.
Download the Oil Cooler Line Orientation Installation PDF Guide here.


VQ G35 Plenum Spacer HP Gain, is it worth it?
SHORT and SWEET
VQ35 PLENUM SPACER, is it WORTH IT?
First of all, what is a Plenum Spacer?
What is a Plenum?
What is a Spacer?
What is Space?
The questions go on...
The PLENUM is the fancy word for VQ35 Intake Manifold. Mainly because the Intake Manifold is made up of a few different pieces, rather than one large cast or welded unit. The Plenum is what collects the air after flowing through the throttle body, immediately before entering your engine. The Plenum Spacer is designed to be installed between the upper 2-piece section of the Plenum. This increases the size of the Intake Manifold. Ultimately increasing the volume of the Intake Manifold.
In simple terms MORE AIR MORE POWER.
Is the plenum spacer worth it?
The short answer is yes..
The VQ is begging for some added flow. The BLOX GEN2 HYPERTEMP PLENUM SPACER can add up to 10HP+. Feed your engine more air and let it breathe.
Combine this plenum spacer with an intake, downpipes, and exhaust, you will instantly feel the difference in power throughout the entire powerband. Not to mention the sound of a well-tuned intake is better music than whatever top 40 is playing anyways.
Fig 1. Shows a good example of a VQ35DE Upper Plenum

The new Plenum Spacer would be installed in place of marked “GASKET”
---------Here is a thread that had some useful information
And,
Here is the sequence suggested for upper plenum removal.

Bolts 1, 3, 6, & 9 = M6 x 1 x 60mm (red)
Bolts 2, 4, & 5 = M6 x 1 x 45mm (yellow)
Bolts 7, 8, 10, 11, 13 - 16, & 18 = M6 x 1 x 25mm (green)
Nuts 12 & 17 = M6 (green; these nuts & studs are sometimes replaced with M6 x 1 x 25mm bolts in aftermarket applications)
----------
Keep in mind the essentials of your VQ before throwing more power at it.
Cooling is a must if you are doing any sort of spirited or track driving. VQ Direct fit oil cooler kits can be found here,


6 Easy Upgrades to a Track-Ready Drift Car
So you have a RWD vehicle and you've seen some YouTube clips
You mucked around on side streets and behind factories and now you think you're a baller. You've decided it's time to hit the track. Here are some key vehicle and personal components you must not overlook.
Now where to begin. There are 3 steps in a track-ready drift setup.
SAFETY - RELIABILITY - PERFORMANCE in that order.
Step 1 SAFETY
First of all. Before hitting any type of track or event.. even before any “spirited driving”. Your car must be SAFE. Not everyone has the same standard for safety. So let's call it the Vehicle Safety Standard put out by your city, town, province, state, wherever you are.
This includes:
Quality front tires, fully functional brakes, working seatbelts, bolted-down seat, no sketchy battery tray strap zip-tied ball of yarn bullshit.
Don’t forget 9/10 track days you will be required (as well as your passenger) to have:
Fully enclosed shoes, full-length pants, a full-length shirt, and obviously an approved full-face helmet. Might as well get some racing gloves at this point too.
Now that you have a safe well-running vehicle and the bare minimum personal safety outfit.. seat time is your main priority when at a local drift event. Having a reliable vehicle is the defining factor between a good track day or a bad track day. Given you don't smack a wall.
Step 2 COOLING
To ensure a full day’s work out of your ride you'll want to cover the basics. Overheating seems to be the leading cause of “total bummer dude” at any track day. Before you go do a “big turbo upgrade” or throw any “stage 3 ECU CHIP” or any so-called power adders for that matter. Do yourself and your engine a favour and spend some $$ on cooling components. Learn more about our Grassroots Performance Cooling Systems here.
An aluminum radiator is a great place to start. Maybe even a set of electric fans and fan shroud. Anything really over the old junk you may have in there now - should be considered an upgrade. Next up is your oil cooler, a mini radiator for your engine oil. Think of it this way...even with the best radiator setup you can muster up. As soon as your engine oil overheats, it heat soaks the rest of your engine. Meaning the oil is so hot it heats up the surrounding area your radiator is trying to cool. Not to mention the oil loses most of its viscosity properties once out of operating temperature as well. These two components are vital to all performance cooling systems.
Now if you’re a real baller and you wanna smashish some hashish the first day. Then you can even go as far as a power steering cooler. Yea, all that steering and scandy flicks get that fluid going and heats her up real good. There are easy inexpensive ways to do this. Do some research. Lastly. Now we are not saying to go and buy carbon fiber brake ducting kits from Europe. But we are suggesting you take a look at your brake fluid. If it’s old and shitty. It will overheat, you will get brake fade, you will crash. It’s proven. So an easy brake upgrade is putting some proper brake fluid. Something with a higher operating temp value. Anything really over the old junk you have in there now is considered an upgrade. See what’s happening here?
Find more Grassroots Performance Cooling products here. Universal & Direct-Fit Applications.
Step 3 PERFORMANCE
Now you’re safe, reliable, and ready. Well, maybe. But your car might not be. Some final performance factors you should be interested in acquiring are as follows.
Do not show up with an underpowered vehicle, open diff, stock suspension, and expect to have the result you’re looking for. The bare minimum we would suggest for any DECENT RWD vehicle is as follows. Now keep in mind, all vehicles vary in power, handling, etc.. these are the general bolt-on upgrades needed for a reputable setup.
In no particular order here are 6 easy upgrades to get your vehicle legit:
It may seem overwhelming. Bottom line is “You wanna play, you gotta pay”. You can either pay the price of money and efforts by following these steps. Or you can pay the price of having a crappy day at the track. If you cover these basics you will have just as much fun as the next guy who's running a sequential gearbox v8 turbo. At least to a certain degree.
At the same time, you will benefit the most of all your pals because you will be on the track making skids the longest. Don’t worry about 500hp, don’t worry about this crazy angle kit you don’t have. Get out there get some seat time and make good times!
Hope this helps.


Gauge Types
Let’s talk numbers. Don’t worry, not the numbers you’re probably thinking of. These are the numbers you should be thinking of and watching most. Gauges - the only communication a driver has with his machine. A majority of the time with proper engine management and a reliable way to read what’s going on, the driver should be able to prevent mechanical failure or even stop before any damage is done at all. Gauges are a drivers best friend when it comes to in car communication. Water temperature, oil temperature, oil pressure, air/fuel, RPM, boost, the list goes on and on. So what gauges does your car need? Which gauges are best suited for your use? Electric or mechanical? What’s the difference? This blog is a breakdown on gauges and how the form/function works in every vehicle. Aftermarket gauges are universal to all vehicles, so whether or not you drive an import, domestic, turbo, or naturally aspirated vehicle, you’re going to want some type of gauge system installed in your cockpit.
MECHANICAL vs ELECTRIC
Mechanical vs. electrical - a common question we often get here at Grassroots Performance. All of our gauges are electrical sensor type gauges. This means that there is a sensor installed somewhere in your engine bay in regards to the system it’s monitoring. This sensor remotely reads a signal and sends it through a wire to your gauges in your cockpit. We often get asked “is there a cheaper mechanical version?” No. we do not sell or recommend the use of any mechanical gauges. Although proven to be just as accurate as an electrical gauge, the mechanical type gauge will actually bring the fluid it’s monitoring inside the cabin directly to the back of the gauge. This means that you will have scalding hot oil, water, fuel, etc, all entering the cabin of your vehicle. Heaven forbid should any crash or dismounting of gauges happen, but this would lead to a rainfall of burning fluids flying around your car. This is something we have seen far too many times while racing in the past and strongly suggest using only electric type gauges. All Grassroots electrical gauges are calibrated to be within 3 degrees of the OEM sensor.
WATER TEMPERATURE GAUGE
This is a must in any water-cooled vehicle. Water temperature will give you an accurate reading of your water or coolant. This is the fluid running through your radiator that is essentially cooling your entire motor. It is a vital aspect and a must when deciding on gauges. Anything from a radiator leak, to improper bleeding, will be easy to see on a water temp gauge. Not to mention with this standalone independent water temperature gauge it will be a much faster reading than a typical OEM IN DASH temperature gauge. Usually by the time your OEM temperature gauge reaches its point the damage is already done. How do you hook this up? Grassroots Performance has a simple solution. We offer an “In-line” temperature sensor adapter for all sizes of radiator hoses. This will quickly and effectively give you a ⅛’ NPT port to easily install a water temperature sensor without having the headache of drilling or tapping the water pump or engine itself. Going this route will also allow you to run your existing OEM water temperature sensor and will avoid the interruption of any stock OEM electrical system from the factory.
OIL TEMP GAUGE
Very similar to water temp gauge, the oil temp gauge is also a vital to any performance build. This will accurately tell you the operating temperature of your engine oil at any given time. Oil temp gauge will reflect the internal oil temp of what's happening in your engine and accurately and quickly display the results.
OIL PRESSURE GAUGE
This is one of the most important gauges you can buy. The oil pressure gauge will actively respond to On throttle, off the throttle, and idle situations of your engine along with others. Knowing the pressure of your oil is important because of constant changes and strain on your motor. Reading an oil pressure gauge is easy, once you know your average running pressure, you can keep an eye on what's happening. If you suddenly notice a drop in oil pressure, or for some reason see a spike, you know that something in your engine is not right, even though you may not hear or feel any difference, a prime example is a simple slide off into the dirt. You may drive back on track with no damage or weird sounds, but your oil pan was punctured or hit, and now your oil pressure gauge is out to lunch. You pull over and see a huge smack right in the middle of your pan. That $70 gauge just saved your motor. We speak from experience on this one.
BOOST/VACUUM
If you have a turbo or supercharged setup then most likely you will want to know what PSI you are running. A boost gauge will “T” into your vacuum lines and display the PSI or BAR you are running your turbine at. Overboosting or under boosting is a problem that may occur when initializing your setup.
AIR/FUEL GAUGE
An air/fuel gauge is a vital component to any boosted or custom tuned vehicle. This gauge monitors the ratio in which your engine is mixing air and fuel. If you have a setup that's running lean (too much air not enough fuel) you run the risk of blowing your motor. If your setup is too rich (more fuel than air) your engine will choke out and run terribly like a pig hence the term: #pigrich.. The ideal and most common ratio is 14.7:1, this means 14.7 parts of air to 1 part of fuel. If your vehicle is running an OEM computer and tune, then the Air/Fuel Gauge is not necessary. If you install a piggyback system or a stand-alone computer system, in which both of these setups need to be custom tuned- an air/fuel gauge is a must. NOTE: when purchasing an air/fuel gauge ONLY buy a wideband system. Wideband systems use their own designated O2 sensor for the most accurate readings. Do not use a narrow band gauge, they are inaccurate and a waste of time and money.


How To Install A Grassroots Performance Steering Wheel
STEERING WHEEL INSTALL
Upgrading from the stock bulky steering wheel to an offset, lightweight, proper sized steering wheel will drastically increase the response and feeling the driver has for the vehicle. This is essential to any racecar build and is easy, affordable, and quick to install.
1. Straighten your wheels. On a flat even surface, turn the steering wheel until the wheels alignment is symmetrical.
2. Disconnect the battery.
3. Remove the steering wheel cover. Usually, the horn/airbag cover must be removed. Refer to your FSM (factory service manual) for the correct steps on doing this.
4. Unscrew the center bolt.
5. Remove the steering wheel. Rock the steering wheel left and right until loose, and you can safely pull it the center bolt. MAKE SURE CENTRE BOLT IS ON WITH A FEW THREADS SO WHEN THE WHEEL CRACKS LOOSE YOU WON'T SMACK YOURSELF IN THE FACE!!
6. Bolt the BOSS hub to the steering wheel column.
7. Reattach your horn. Tighten all hardware If you have a real race car you can skip this step.
8. Attach your steering wheel to the new hub. Tighten all 8 allen key bolts and nuts.
9. Tighten all hardware.
Download the PDF here for step-by-step instructions and picture diagrams on how to install your Grassroots Performance Steering Wheel.

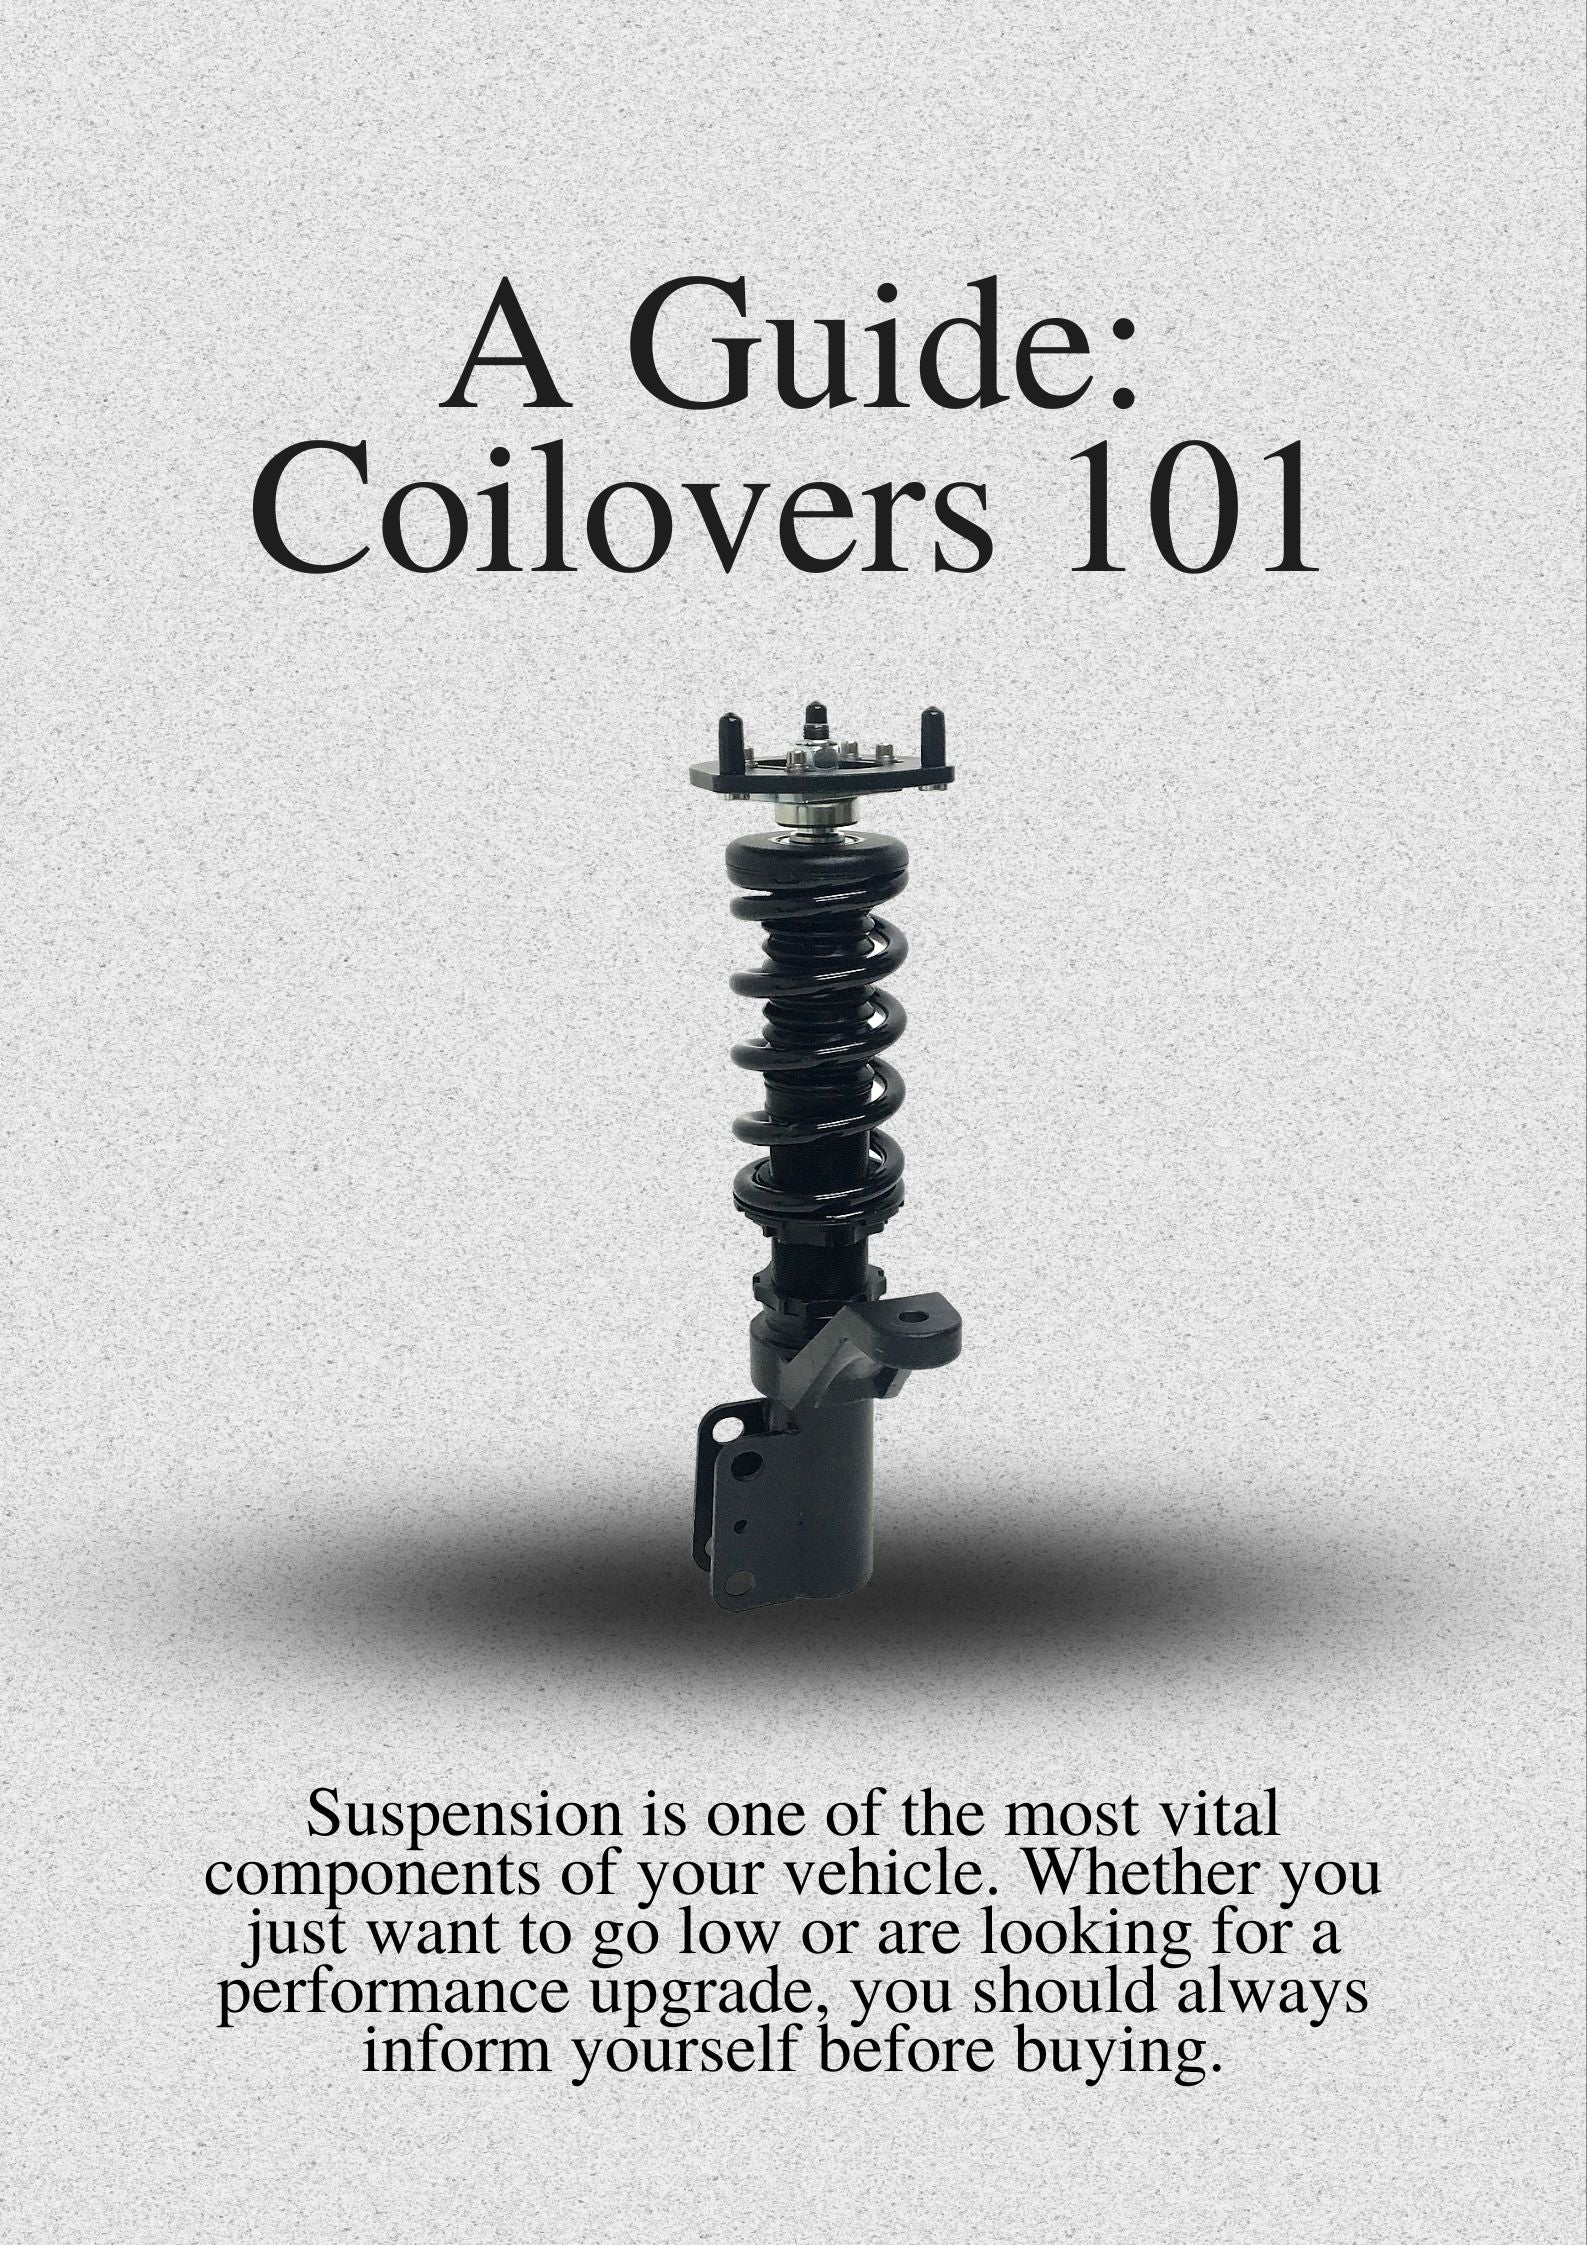
Coilovers 101
What are coilovers?
Suspension is one of the most vital components of your vehicle. Whether you just want to go low or are looking for a performance upgrade, you should always inform yourself before buying. In this post, we will be explaining the different types, and functions of coilovers that Grassroots has tested.
We begin with the basics.
What makes a coilover? Take a look at this diagram.
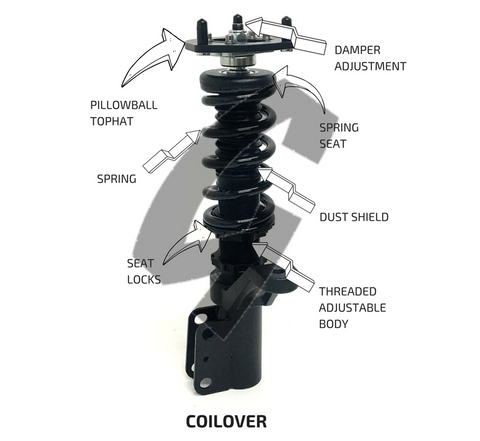
Springs control the amount the suspension moves up and down, and struts/dampers, the other main component, controls how fast this movement happens. In a real-life driving situation, the spring would determine the amount of roll, squat, and dive of your vehicle. While the dampers would control the speed at which these actions happen. Ultimately, the combination of the 2 is what decides the ride quality and performance of each unit.
Spring Type Basics and Spring Rate Conversions
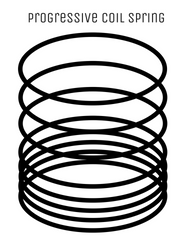
Progressive Springs are used on non-adjustable units. Example being, a standard OEM assembly or a mere simple lowering spring. This means there is no exact spring rate number. The spring is designed to fluctuate as the driving force and pressure are applied. This would be more for a generic setup where performance is not the key upgrade intent.
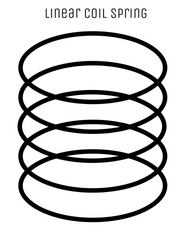
Linear Spring rates are set numbers. This means the weight needed to compress that spring under load does not change. This setup delivers much higher performance but comes with a stiffer ride. Linear type springs are found on the most common coilover setups.
Spring rates can get pretty technical when calculating. The stiffer the spring, the less travel the suspension will have. Weight and driving type must also be taken into consideration. Street, Drifting, Drag racing, Circuit, Rally, Autocross etc... all have different requirements. Most commonly seen is a spring rate given in KG/mm or LBS/in. This means the weighted force / the space traveled. For example, 700LB/in would mean 700 pounds will compress that spring 1”. This can also be read as 12.5K/mm (12.5kg to compress spring 25mm). Below is a simple chart of just a few spring rate conversions.
Spring Rate Conversion
Approx 1KG/mm = 56LBS/inch
700 lb/in = 12.5 kg/mm
650 lb/in = 11.6 kg/mm
600 lb/in = 10.7 kg/mm
550 lb/in = 9.8 kg/mm
500 lb/in = 8.9 kg/mm
450 lb/in = 8 kg/mm
400 lb/in = 7.1 kg/mm
350 lb/in = 6.2 kg/mm
300 lb/in = 5.3 kg/mm
250 lb/in = 4.5 kg/mm
Twin-Tube vs Mono-Tube
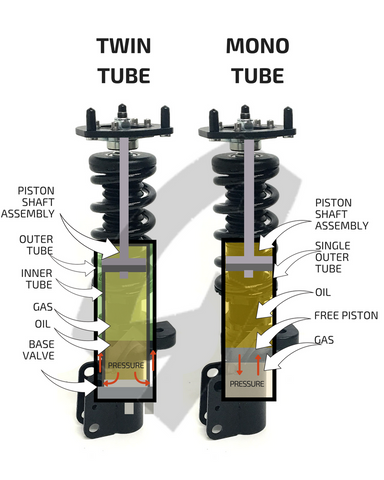
Twin-Tube
This is a major fundamental when it comes to coilover units. Especially since both types can look physically identical to each other. Twin-Tube construction is made with an inner and outer tube. The smaller diameter inner tube, is where the piston shaft, valve, and oil are found. The larger outer tube houses damper oil, and nitrogen gas. Twin-tube construction is commonly found on most OEM units or street style coilovers. The reason for this is the ratio of piston stroke to body length. Meaning there is more piston movement internally of the unit. This gives a more comfortable ride, and has a high tolerance outer tube for longevity. A quality twin-tube construction usually has between 19-24 levels of dampening. This allows adjustable ride quality and performance. Although this design is not recommended for racing or track vehicles.
Mono-Tube
Mono-Tube setups come standard equipment in some high-performance factory vehicles, and often the design used in higher quality aftermarket racing suspension. Mono-Tube design has one outer tube. The oil and gas chambers are separated by a floating valve style piston. This setup puts the damper oil on top and damper gases on the bottom. The simple design allows this unit to have larger, stronger internal parts. This combination equates to more oil/gas capacity, more damping force, and much better heat dissipation under continuous load. Under race driving conditions, the internal valve moves more toward the gas chamber, which gives the unit quicker, more aggressive response outputting higher performance capabilities. Some mono-tube setups can also be designed inverted, which mounts the damper upside-down on installation.
Launching early 2018, all Grassroots Performance coilovers sets will be made using mono-tube construction. The dampers are valved specifically to our specifications, and the spring rates are decided on by use of the vehicle.


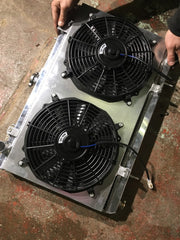
DIY: How to Drain, Change and Bleed your Radiator
Why you should upgrade to an aftermarket performance radiator
A radiator is a vital component of any liquid cooled engine. With a cracked or leaking radiator, you constantly run the risk of overheating your ride. At the same time, even if your radiator is fine, if it's not bled properly it will have air pockets that can result in fluctuating engine temps and possible overheating. If you plan on racing or doing any sort of extended spirited driving, an upgraded aluminum radiator is one of the first things that should be taken into consideration.
This is a brief description of how to remove, install, and bleed an aluminum radiator on a liquid cooled engine. There are a variety of techniques that can be done to have the same end result, this is what we’ve found most efficient and effective.
The ride that will be going under the knife today is our trusty Nissan 180sx S13 with an sr20det.This vehicle has been with us for almost a decade now. And is still going. Maintenance is a vital component to keeping your ride reliable. Street or track.
Tools & Materials Needed
- New Grassroots Performance Aluminum Radiator (silicone hoses and electric radiator fans are also available)
- Drain Pan (A large aluminum cooking tray will do the trick).
- Coolant of your choice (50/50 premix, diluted concentrate, distilled water, water wetter, Lucas super coolant, etc)
- Socket set/wrench set
- Radiator Bleed Kit (optional)
Step 1: How to drain a radiator
**MAKE SURE ENGINE IS COOLED DOWN FOR THIS PROCESS
- Start by carefully removing the radiator cap. This will release any pressure that’s already built up in the cooling system, and allow a free flowing draining process.
- Locate the radiator drain plug for your radiator, and place your drain pan under it.
- Now you can safely remove the radiator drain plug and collect all the old radiator fluid into your drain pan. Give the radiator hoses a little squeeze to get as much fluid out as possible.
****A quick and dirty way to drain your radiator would be to just remove the lower radiator hose completely, and the coolant will come rushing out. This will make a mess of your workspace. We do not recommend this.
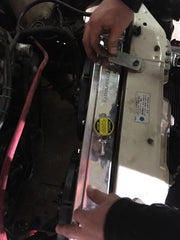
Step 2: Remove the Radiator
- Now that your old radiator is drained, you can safely remove the upper and lower radiator hoses.
- Now remove any radiator mounting brackets that are holding your radiator in place. Disconnect any plugs or harness that may be connected to the radiator.
- Carefully remove the radiator from out of the car.
At this time it is recommended to replace your thermostat. Especially if your car was overheating before beginning this install there is a likely chance that your existing thermostat could have been damaged.
Step 3: Prep/Install New Radiator
All Grassroots Performance Radiators are tested, quality inspected, and come with a lifetime warranty. Includes a Radiator Cap.
- If you are using your existing fans, this would be a good time to switch everything over. If you are installing a new radiator fan and shroud, this is also a good time to install them.
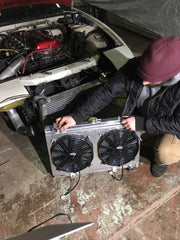
- Carefully install your new performance radiator into place. Re-install the existing radiator mounting brackets. Install the upper and lower radiator hoses. Plug in your electric fan harness (if applicable).
Step 4: How to bleed a radiator
This is a question that’s been answered many times. There is a variety of right and wrong ways to do this. But it’s really quite simple. Here at Grassroots Performance, we have never had an issue using the standard “Radiator Bleed Kit”. Available at Canadian Tire, or any other auto parts store. If you’re really on a budget, or just don’t want to make the trip to get it. You can follow the same procedure by just being careful and watching the radiator neck.
Bleed Process
- Have your ride on a flat surface.
- Ensure coolant lines, radiator mounts, and radiator drain plug are securely fastened.
- Fill the radiator with your desired coolant.
- Insert the “Bleed Kit” on the neck of the radiator and continue filling until it's half full.
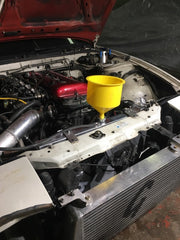
- If you are not using a radiator bleed kit, fill your radiator to the top of the neck.
- Ensure there is coolant in your overflow tank.
- Start your engine. Do not put the radiator cap on (ensure you are in a well-ventilated area).
- As your engine gets up to operating temperature, your thermostat will slowly open. You will notice bubbles and gurgles of air coming up through the coolant. This is a good sign. Make sure you are always adding coolant while the engine is sucking it down. Keep the coolant level above the top of the radiator. Continue this process for about 10-15 min. Keep adding water until the engine is at operating temperature, and the bubbles have stopped.
- Now that the air bubbles have stopped, and your radiator and overflow tank are both full, you can now put the Radiator cap back on.
Congratulations, you just installed a performance radiator. Now get to the track and enjoy some extended track time with your cooler running engine.
------------
Grassroots Performance has a variety of radiators and cooling components with a lifetime warranty. Including silicone hoses, fan shrouds, electric fans, oil cooler kits, and other race car essentials. For many makes and models.


Blow-Off Valve VS. Wastegate
What size wastegates do you have and how are they different? What size/kind of blow-off valves are available?
I get these questions a lot. Here is a quick summary of the two.
First off, know the difference - both of these components are used in turbo setups only.
Let’s start with wastegates.
Wastegates allow the unused exhaust gasses to exit safely into the exhaust or atmosphere rather than through the turbo. For example: if you’re running 10 psi out of your turbo, the remaining exhaust gasses that could push your turbo to a higher psi, is diverted out through the wastegate, ultimately regulating the turbo speed.
Two Types of Wastegates
Internal Wastegate - typically found on OEM setups and smaller sized turbos (ie. GT25/GT28/Td05, Sr20det, RB25det, 1JZ, 2JZ OEM Turbos etc.). Most of these internal wastegates are non-adjustable, and a manual or electric boost controller would be needed for increasing boost levels. Although there are aftermarket internal wastegates that do have an adjustable rod to some degree.
External wastegate - these wastegates are typically found on setups that demand more performance and higher horsepower. External wastegates have an adjustable or replaceable spring for adjusting boost levels. The external wastegates range in size and style. Typically you will find a 2-Bolt flange style, or V-Band style. This is your preference. For sizing, don’t let it get complicated. Below is a rough idea of the general capacities of the most common performance wastegates. Actual specs and capacities may vary between types and brands.*
|
In some cases, twin wastegates can be used. Wastegate setups can become pretty extensive if you are doing a crazy custom manifold or something wild. But in most cases, the suggested sizing has always worked in our hands.
Finally, onto something much simpler, the Blow-off Valve.
What does a blow-off valve do?
Well, 9 out of 10 turbo cars on the road will have an intercooler system. Even OEM turbo cars will have a BOV or relief valve of some sort incorporated into their intercooler system. The BOV is most commonly found close to the throttle body, but may also be installed in other areas due to space restrictions. The main purpose of a BOV is to release the built up boost pressure in your intercooler piping. The result of not releasing this pressure will cause a backlash of air against your throttle body and/or turbo itself. Air pressure against your throttle body will give you an inconsistent sensor reading and may also result in a rough idle or other vacuum related problem. Backlash air against your turbo will cause that ‘Flutter’ sound that everyone likes, everyone except your turbo that is. The built-up air must be released, or else the turbine can go from full spool to a drastic change in airflow resistance. Over time, this may ultimately cause premature turbo failure.
There are 2 types of BOVs or at least 2 ways to have them installed. One is a recirculated system. This is when the air released from the BOV is routed back into the intercooler/intake system. The second is Vented to Atmosphere. Venting to the atmosphere is most common and will produce a more aggressive relief sound. Some say they get a better response from their turbo with no BOV, others will say it’s a problem waiting to happen. We suggest running a BOV in any turbocharged vehicle. But do whatever tickles your fancy. As for sizing, BOV are much simpler than wastegate sizing. Here at Grassroots Performance, we have tested 50mm wastegates to be the best performing size BOV from small applications and horsepower such as sr20det and rb20det, all the way up to turbo-powered LSX setups. Piping size for your intercooler is also something to take into consideration, but for the most part, a 50mm BOV properly installed would cover the basics of most turbo setups. If you find yourself with a set of twins, then you’re a lucky guy. And if you are running twin turbos on your setup, then you’re right if you guessed you can run 2 x BOVs.
All in all, this post was made to simplify the differences between a wastegate and BOV. Information and specs may vary on the exact models of components you are using. We hope this blog points you in the right direction and offers some useful insight on suggested sizing we have tested here at Grassroots Performance. The main thing to remember is proper placement/installation of each component, and not overcomplicating. When things get complicated things tend to get expensive. And Expensive + Complicated = Not a fun time.
Learn more about our Grassroots Cooling HERE.Learn more about our Grassroots Racecar Essentials HERE.


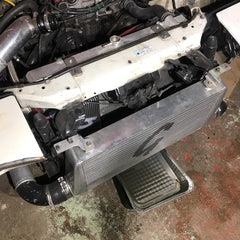
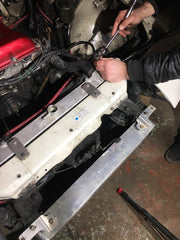
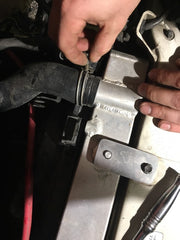
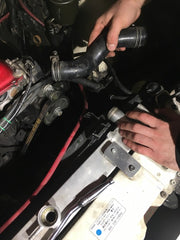
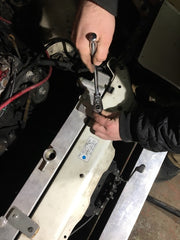
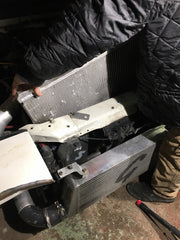
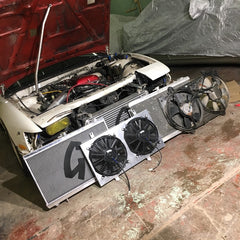
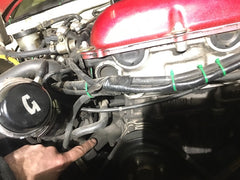
How To Install a Grassroots Oil Cooler on an Infiniti G35
Download a PDF hard copy of the tools required, install instructions, and some nifty tips for saving a few dollars HERE.
Download a PDF to learn more about Oil Cooler Line Orientation here.
Learn more about our Grassroots Performance 19 Row Oil Cooler here.
Find more Grassroots Performance Cooling products here. Universal & Direct-Fit Applications.